前言
每天都要打开指点天下提交健康日志实在是很麻烦,要是10点之前忘了交那可更是麻烦,正好这次社团线下授课讲解HTTP协议时讲课的前辈拿指点天下举了个例子,遂产生了用shell脚本自动提交的想法。
本文涉及到的敏感信息已做处理
使用HttpCanary对指点天下APP进行抓包
捕获打开健康日志页面时发送的请求,进行分析
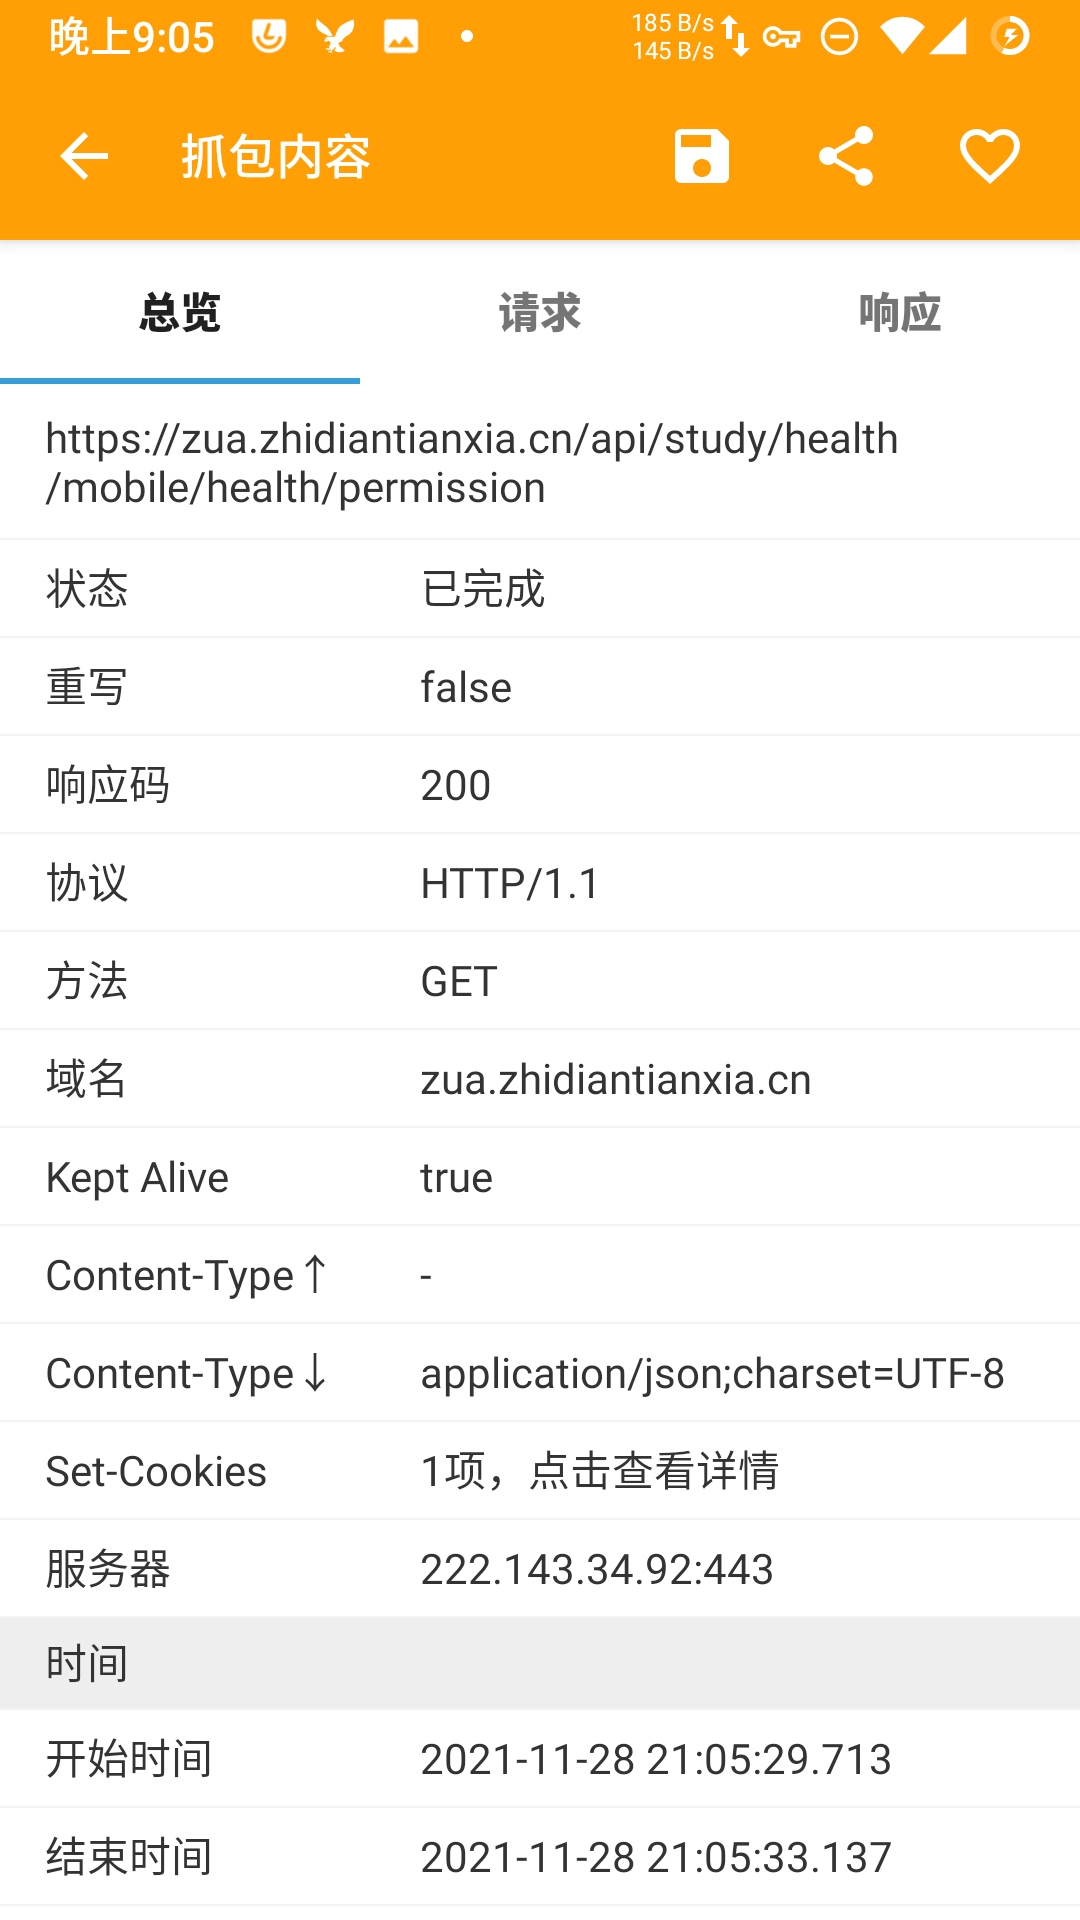
在指点天下APP中点击健康日志按钮,HttpCanary中捕获到如下请求 
请求报文
GET /api/study/health/mobile/health/permission HTTP/1.1
axy-phone: <CENSORED>
axy-token: <TOKEN>
user-agent: MI 5(Android/10) (com.axy.zhidian/1.7.4) Weex/0.18.0 1080x1920
Host: zua.zhidiantianxia.cn
Connection: Keep-Alive
Accept-Encoding: gzip
返回的JSON
{
  "status": 1,
  "msg": "",
  "data": {
    "submitted": true,
    "manage": false,
    "education": false,
    "healthAble": true,
    "templateId": 3,
    "updatedAt": 1637133733000
  }
}
返回的内容看样子没有什么值得关心的信息,但请求头中包含的token看起来挺重要的样子。
于是摸了一阵子鱼之后在wsl中用curl进行以下测试
$ curl -X GET "http://zua.zhidiantianxia.cn/api/study/health/mobile/health/permission" \
        -H "axy-phone: <CENSORED>" \
        -H "axy-token: <TOKEN>" \
        -H "Content-Type: application/json"
{"msg":"token失效,请重新登录","status":5}
草,这token还会过期的吗
捕获登陆时发送的请求,使用curl模拟登录操作并获取token
那么要如何获取有效的token以用于自动提交健康日志呢?
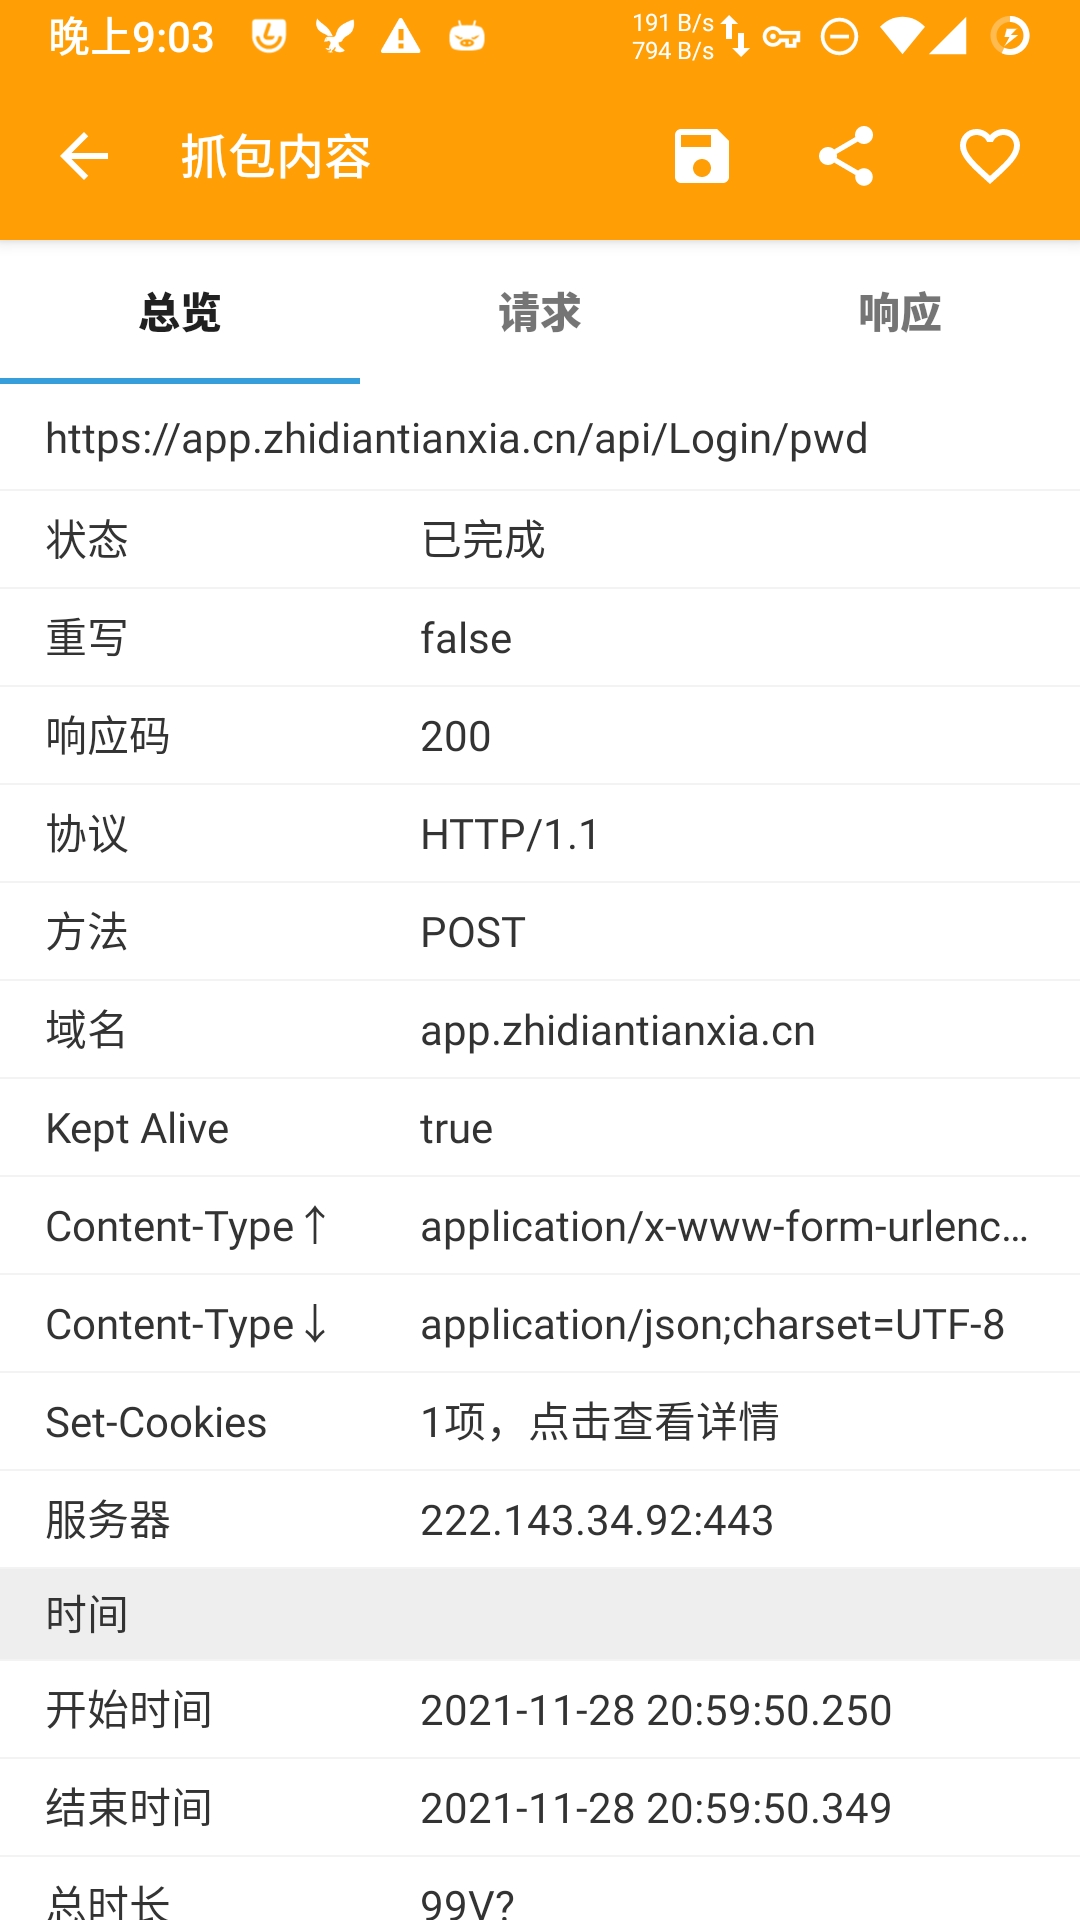
经ymmlom前辈提示,登录请求的响应内会包含一个token,于是重新登录指点天下,在HttpCanary内捕获到如下请求 
请求报文
POST /api/Login/pwd HTTP/1.1
axy-app-version: 1.7.4
Content-Type: application/x-www-form-urlencoded
Content-Length: 193
Host: app.zhidiantianxia.cn
Connection: Keep-Alive
Accept-Encoding: gzip
User-Agent: okhttp/3.10.0

phone=<CENSORED>&mobileSystem=10&appVersion=1.7.4&mobileVersion=MI%205&deviceToken=<CENSORED>&pushToken=<CENSORED>&romInfo=&password=<CENSORED>
返回的JSON
{
  "status": 1,
  "msg": "",
  "data": "<TOKEN>"
}
不难发现 (废话) JSON中data的值正是我们需要的token。
又摸了一会鱼后尝试用curl发送同样的请求
$ curl -X POST "https://app.zhidiantianxia.cn/api/Login/pwd" \
        -H "axy-app-version: 1.7.4" \
        -H "User-Agent: okhttp/3.10.0" \
        -H "Content-Type: application/x-www-form-urlencoded" \
        -d "phone=<CENSORED>&mobileSystem=10&appVersion=1.7.4&mobileVersion=MI%205&deviceToken=<CENSORED>&pushToken=<CENSORED>&romInfo=&password=<CENSORED>"
{"status":1,"msg":"","data":"<TOKEN>"}yattaze!看起来请求中包含的信息并不会随时间改变、设备变更等因素而失效,可以放心搞了(?)
在指点天下APP中提交健康日志并抓包分析
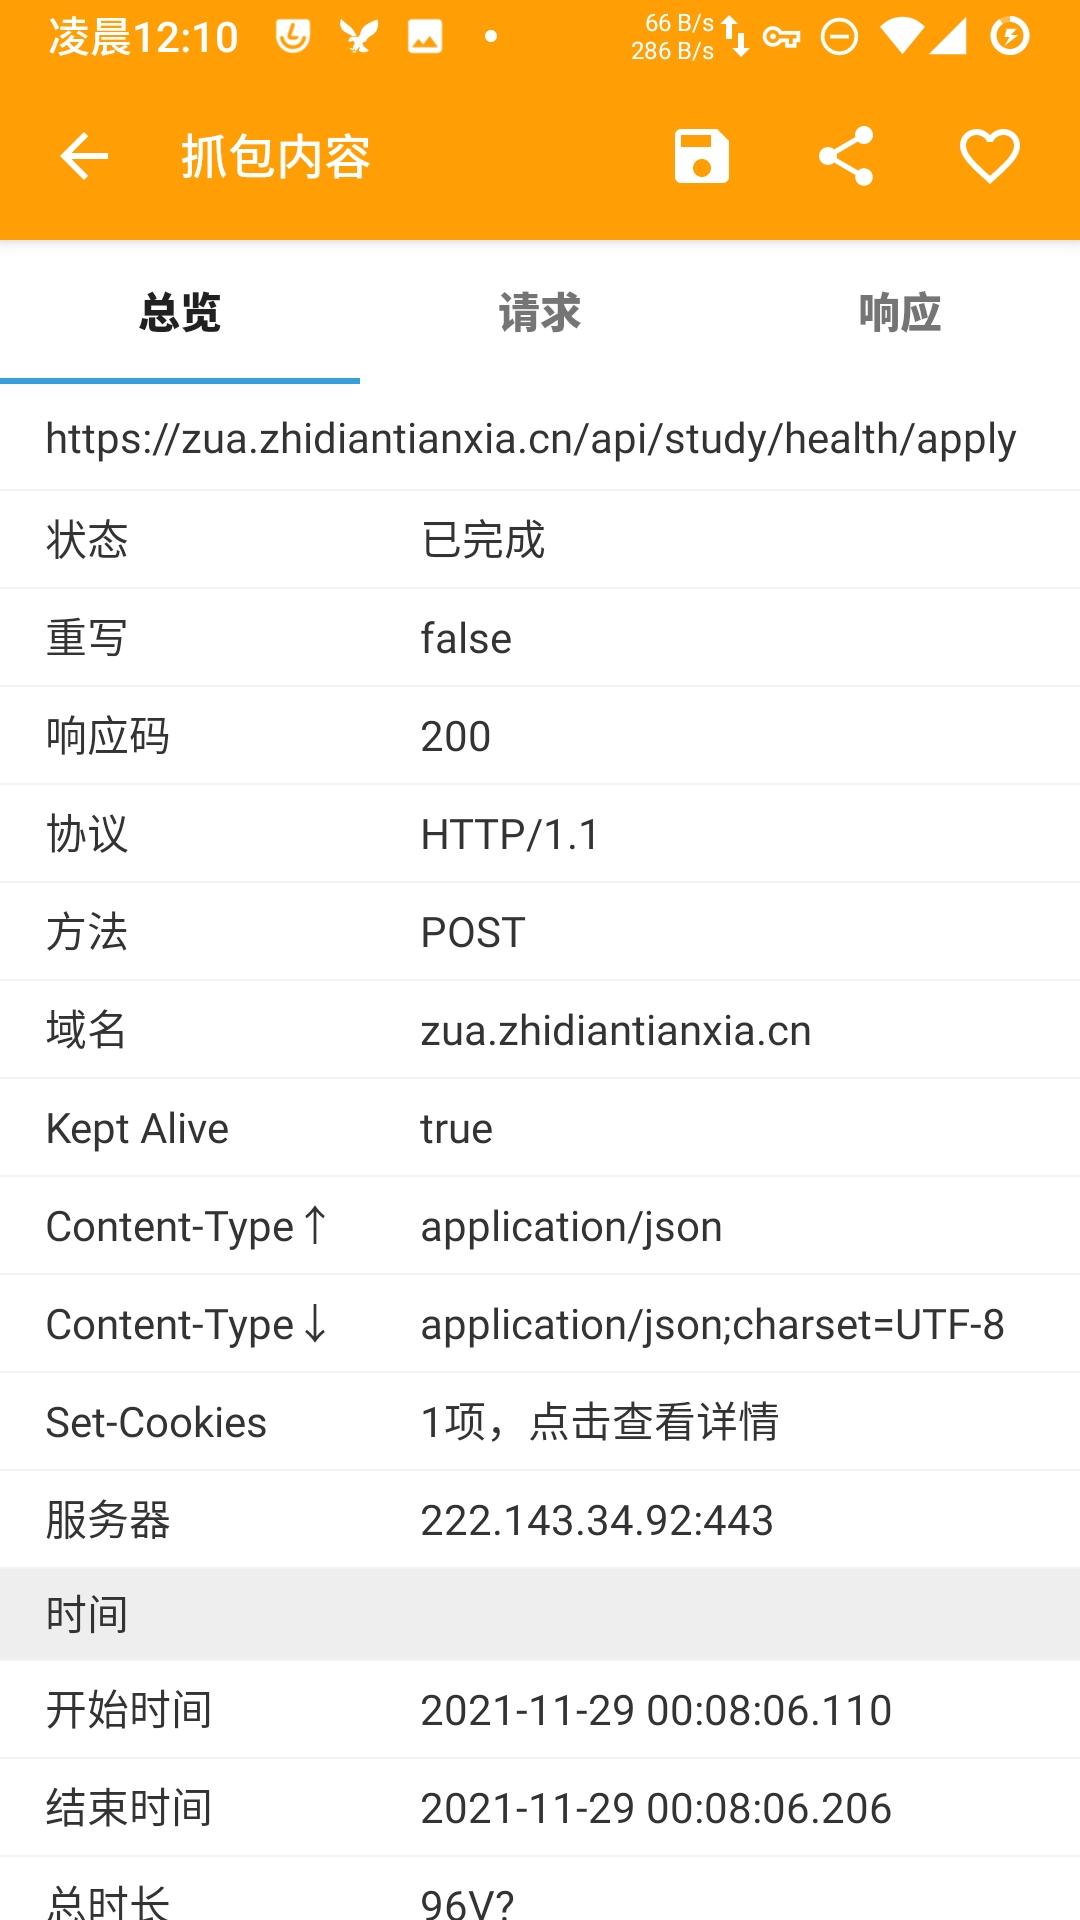
也许是由于过于疲惫,写着写着就十二点过了,对这个不幸忘记提交健康日志倒头便睡的学生,辅导员提出的条件是……? 总之现在又可以提交一次健康日志了。提交后HttpCanary捕获到如下请求 
请求报文
POST /api/study/health/apply HTTP/1.1
axy-phone: <CENSORED>
axy-token: <TOKEN>
Content-Type: application/json
user-agent: MI 5(Android/10) (com.axy.zhidian/1.7.4) Weex/0.18.0 1080x1920
Host: zua.zhidiantianxia.cn
Connection: Keep-Alive
Accept-Encoding: gzip
Content-Length: 518

{<JSON CONTENT>}
返回的JSON
{
  "status": 1,
  "msg": "打卡成功",
  "data": null
}
再使用curl发送一遍同样的请求
$ curl -X POST "http://zua.zhidiantianxia.cn/api/study/health/mobile/health/apply" \
        -H "axy-phone: <CENSORED>" \
        -H "axy-token: <TOKEN> \
        -H "Content-Type: application/json" \
        -d "{<JSON CONTENT>}"
{"status":-1,"msg":"一天只能提交一次","data":null}
提示一天只能提交一次,但这至少说明请求格式是正确的,获取到的token也没错(心虚)
那么之后的部分就是用shell脚本把这些部分组合到一起了。
把获取token——提交日志的操作写成shell脚本
脚本如下
# autosignin.sh
#!/bin/bash
PHONE=
LOGIN_INFO=
HEALTH_JSON=
TOKEN=$(curl -s -X POST "https://app.zhidiantianxia.cn/api/Login/pwd" \
        -H  "axy-app-version: 1.7.4" \
        -H  "User-Agent: okhttp/3.10.0" \
        -H  "Content-Type: application/x-www-form-urlencoded" \
        -d  "$LOGIN_INFO" |\
        grep -Po '(?<="data":")[^"]*')

if [[ "$TOKEN" = "" ]]; then
        echo "An error occoured while getting token."
        echo "Please check your login information."
        exit 1
fi

RESULT=$(curl -s -X POST "http://zua.zhidiantianxia.cn/api/study/health/mobile/health/apply" \
        -H "axy-phone: $PHONE" \
        -H "axy-token: $TOKEN" \
        -H "Content-Type: application/json" \
        -d "$HEALTH_JSON" |\
    grep -Po '(?<="status":)[^,]*')

if [[ "$RESULT" != 1 ]]; then
        echo "An error occoured while submitting health information."
    echo "Status code: $RESULT"
        exit 1
else
    echo "Done, HAVE A VERY, SAFE, DAY."
        exit 0
fi
运行效果如下
$ ./autosignin.sh
An error occoured while submitting health information.
Status code: -1
海星,明天再测试一遍就知道能不能用了(他人事)
明天
草,今天第一次运行的时候还是给提示了An error occoured while submitting health information.但APP提示今天已经提交过了,检查之后发现是匹配status的值的正则写错了,修改之后脚本变成了现在的样子,大概可以正常运行了()
设置计划任务
这里列出两种方法
使用cron设置计划任务
cron无疑是最简单最经典且最通用的方案,这里使用Termux作为环境进行演示。
1. 安装cronie
使用如下命令进行安装
$ pkg install cronie2. 在crontab中添加cron表达式
使用如下命令编辑cron表达式
$ crontab -e在随后打开的编辑器中添加如下内容
# 每天8点执行家目录下的autosignin.sh
0 8 * * * ~/autosignin.sh
保存退出即可
注意: 如果你的运行环境是手机,你可能需要修改Termux的电源设置以确保计划任务正常执行。
创建systemd服务并用timer定时运行
systemd为服务提供了统一的日志管理,运行过程中如果出了什么偏差也方便事后查询,但这种方案只能在使用systemd作为init的Linux环境下使用。这里使用Ubuntu 20.04作为环境进行演示。
使用如下命令创建一个新的service单元
$ sudo systemctl edit --full --force autosignin.service在随后打开的编辑器中添加如下内容
[Unit]
Description=Auto Sign-in
Requires=network-online.target

[Service]
Type=oneshot
User=autumn
ExecStart=/home/autumn/autosignin.sh

[Install]
WantedBy=multi-user.target
保存退出,随后新建一个timer单元
$ sudo systemctl edit --full --force autosignin.timer在随后打开的编辑器中添加如下内容
[Unit]
Description=Auto Sign-in at Every 8 A.M.

[Timer]
OnCalendar=*-*-* 8:00:00
Persistent=true

[Install]
WantedBy=timers.target
保存退出,并启用该timer单元
$ sudo systemctl enable autosignin.timer終わり、閉廷!(脱力)
后记
为什么这么简单的事情给我写的又臭又长还花了这么多时间#望天(现在临晨两点半)
希望这个脚本和这篇文章最后不会带来更多的麻烦(逃
非常感谢ymmlom前辈提供的帮助和指导。

已实现,前来还愿
@RainChain : ∑( 口 ||
好耶
@Nranphy : 好耶